The following document outlines the needed steps to connect your Zoom account with your E-Learning account. Additionally, we will outline the steps needed to disconnect the two accounts if you ever need to do so.
Insight E-Learning utilizes a simple Zoom integration process. Trainers, who are added to classrooms with a corresponding Zoom module, will receive an email notification informing them of the need to connect their Zoom account with their Insight E-learning account.

If this email notification is missed, no worries!
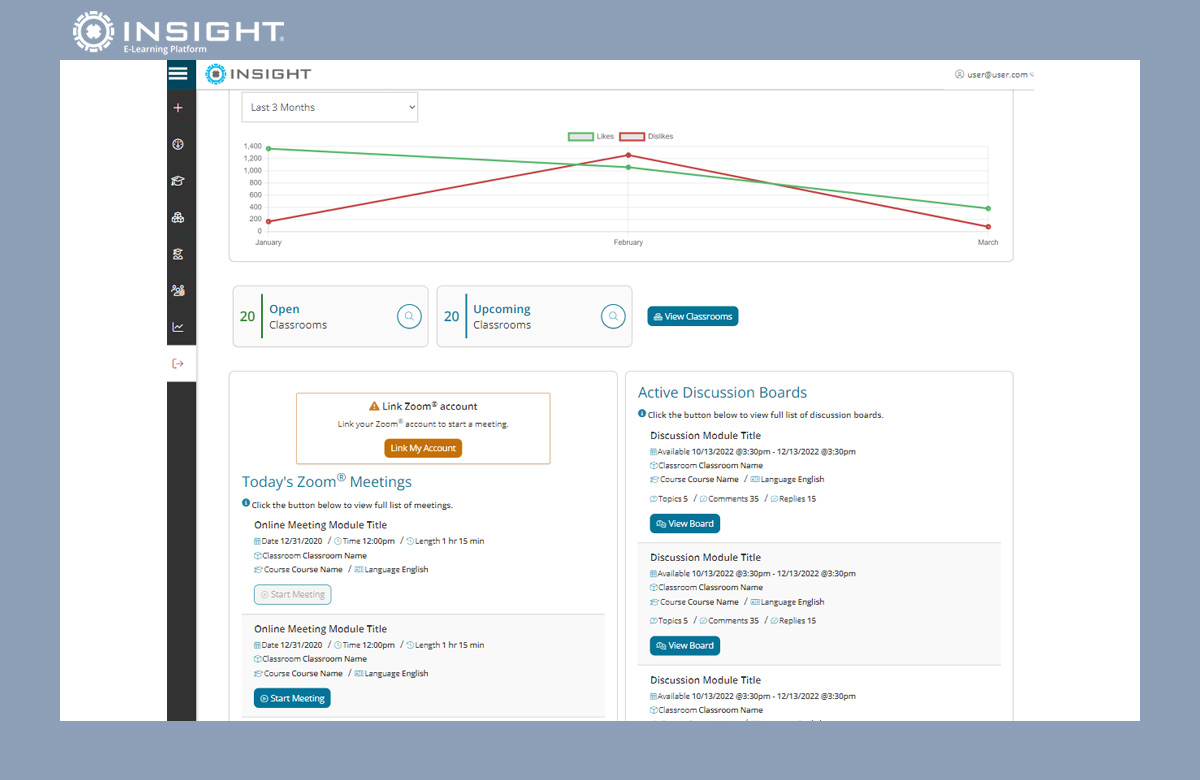
The next time the trainer logs into the system, they will see any upcoming Zoom events they are assigned to in their trainer Dashboard.
Clicking the Link My Zoom Account in either the email or on the trainer dashboard, will direct the user over to Zoom. They will be required to log into their Zoom account where once they are in, they will simply need to confirm the connection.
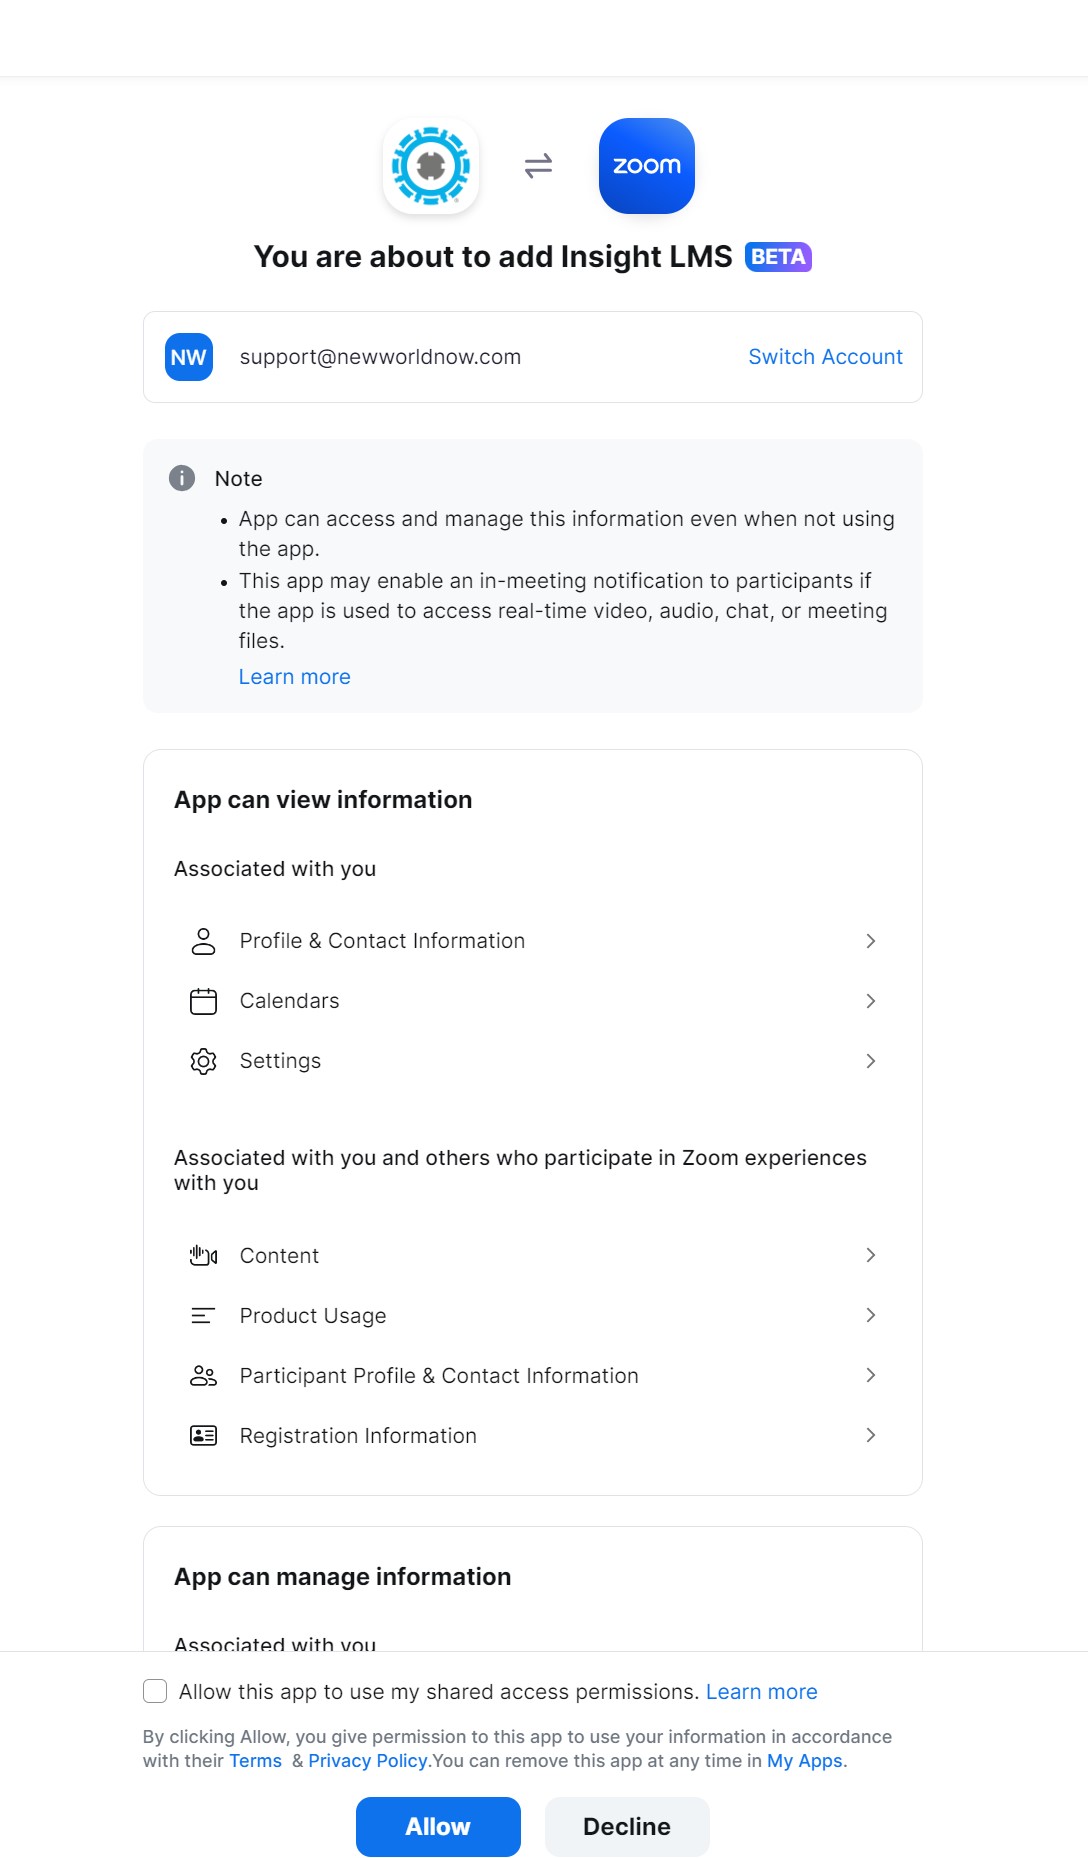
Once the accounts have been connected, the user will be directed back to their Insight E-learning account where clicking the Start Meeting button, where applicable,will launch the corresponding Zoom meeting in it's own tab within the Zoom website.
The Insight E-Learning system provides a simple interface, where Zoom meetings can be scheduled and accessed.
Utilizing Zoom is simple.
Access to the Insight Zoom Module applies to Course Administrators, Trainers, and Learners.
Course Administrators are the users who create/manage courses and classrooms.
They are responsible for the majority of the meeting configuration.
Course Administrators will start by first creating a course. To do this, click the + Add Course in the left-hand navigation bar.
Once on the new course entry view, enter the required information such as title, description, and grading options.
Once the required data is entered:
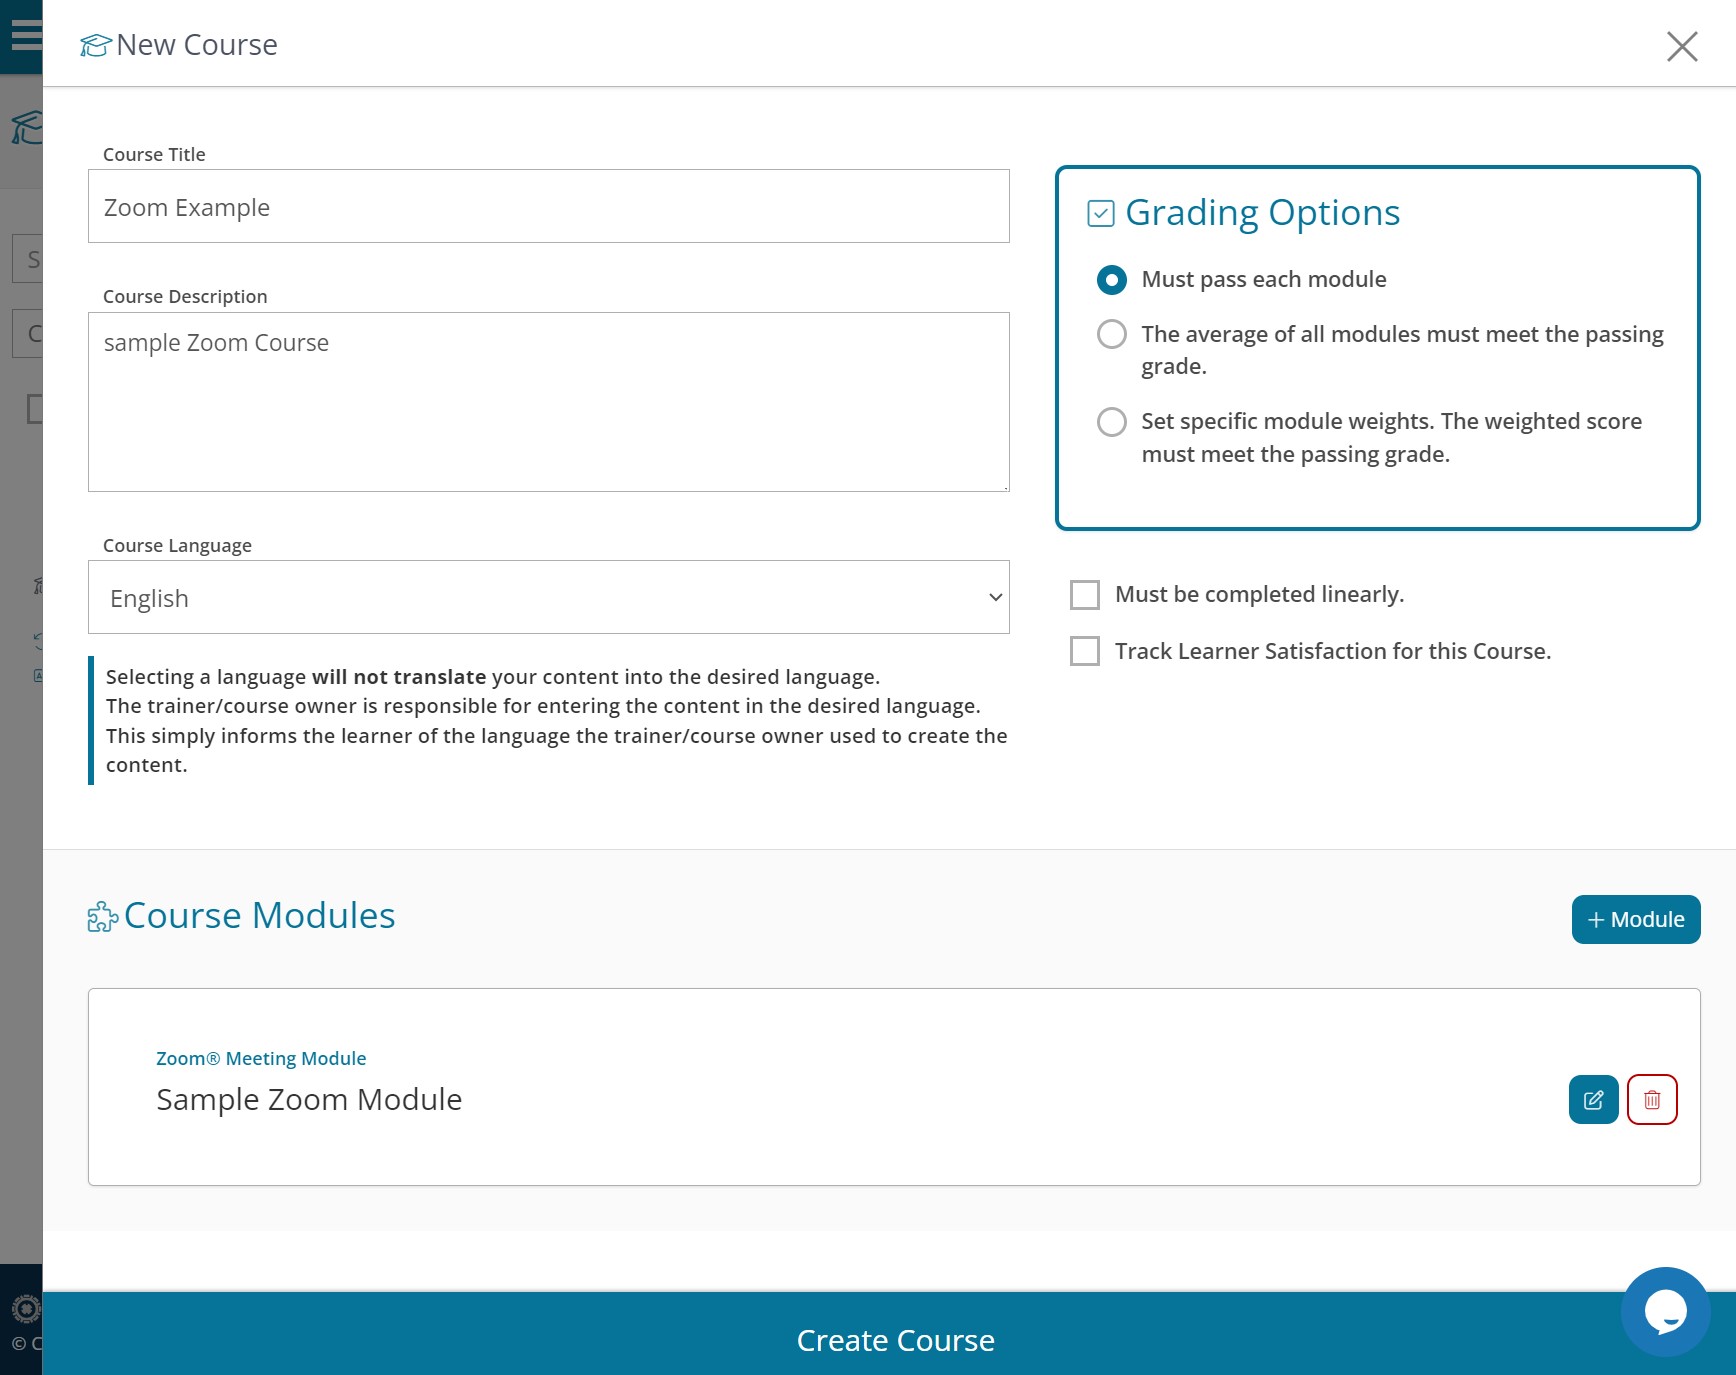
You now have a valid course with a Zoom module.

From here, you can click the
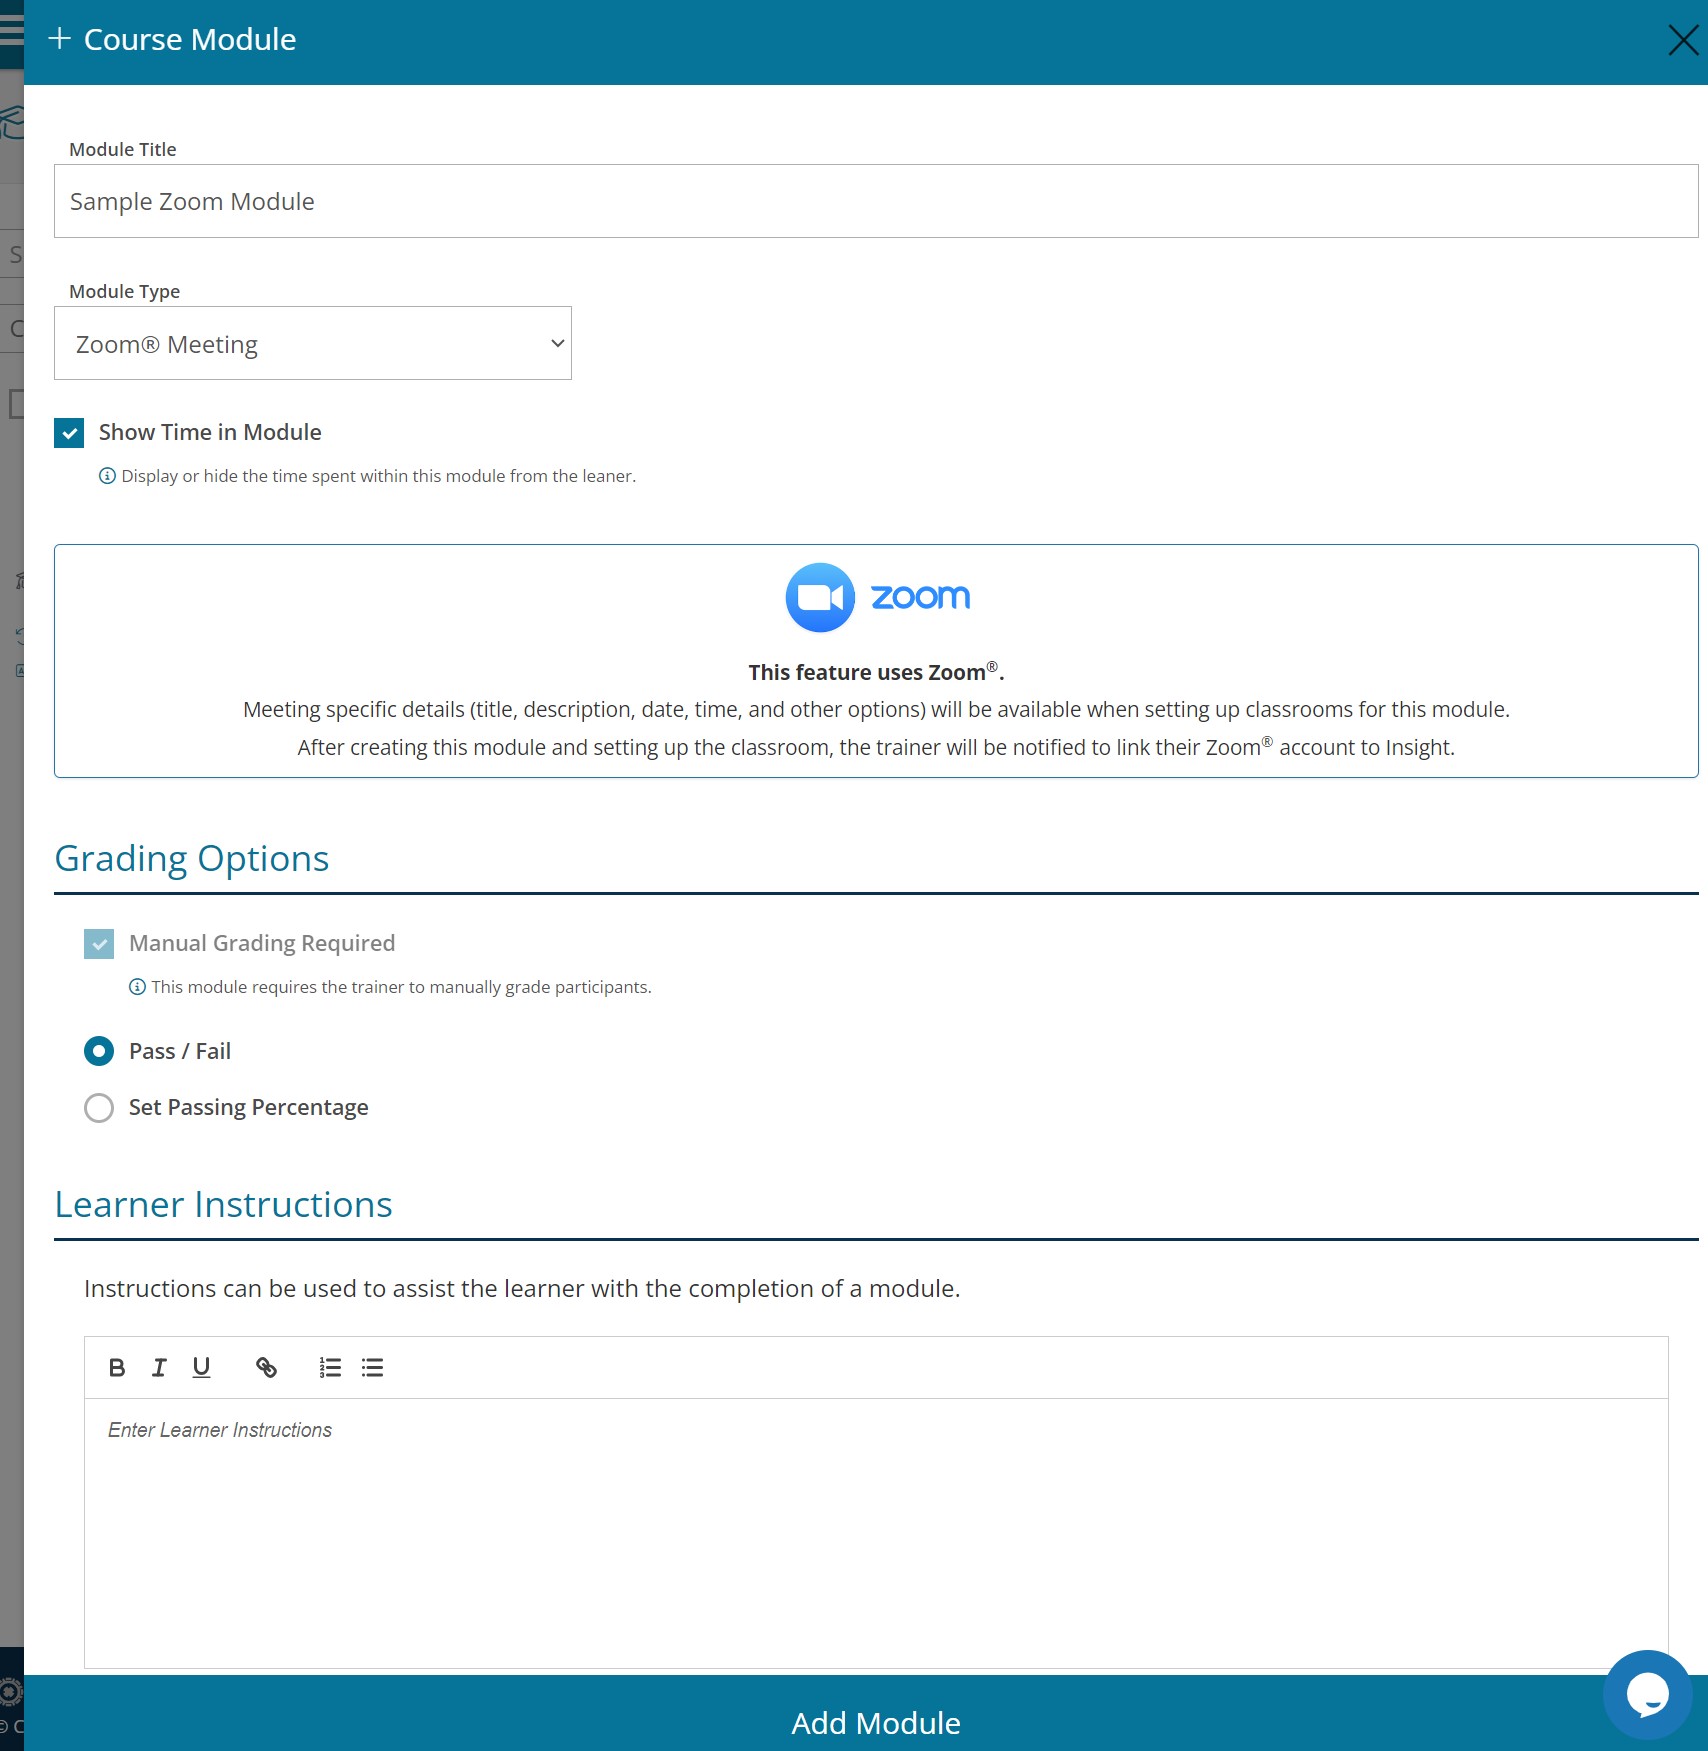
After entering the required Classroom data such as the Title, and Trainer assignment, we will need to schedule the classroom availability.
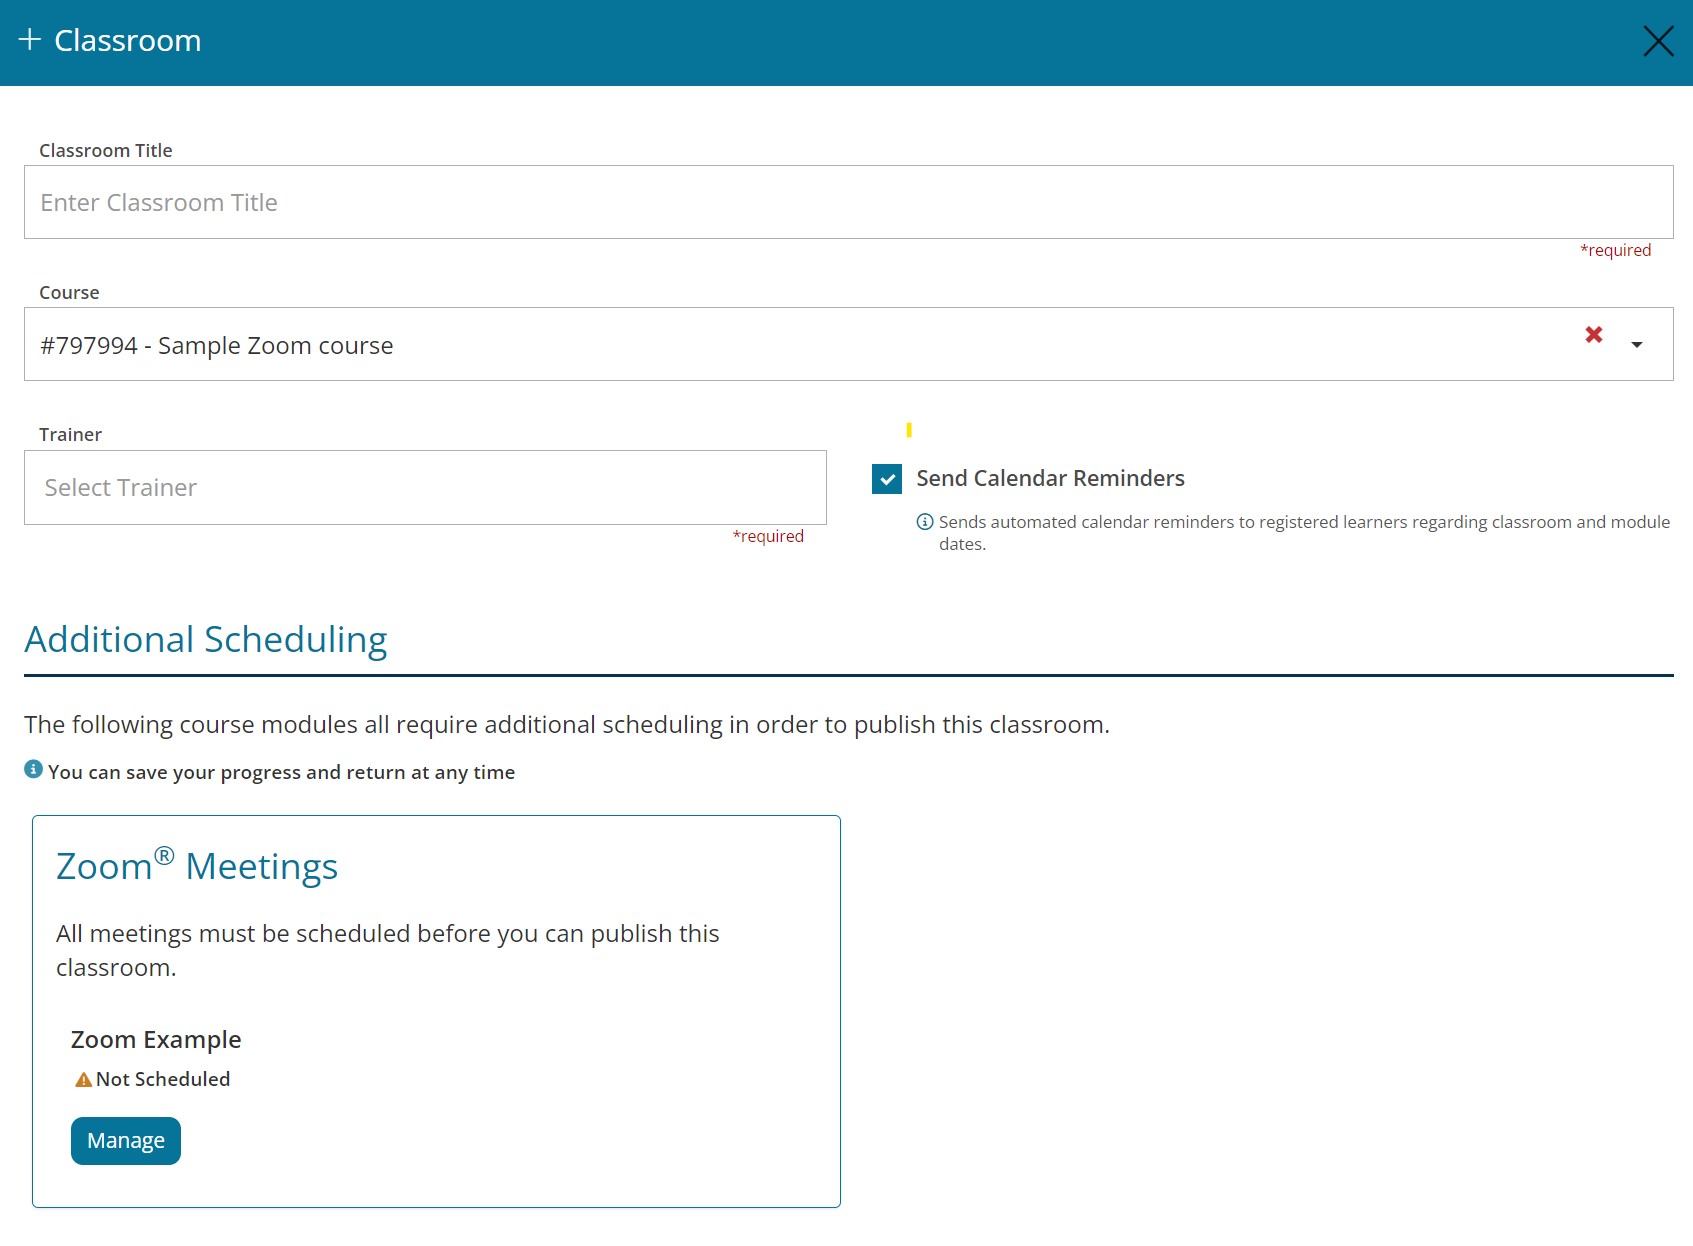
Due to the single Zoom module in this example, the only date configuration we will need is specific to the Zoom meeting. To schedule the Zoom meeting, do the following:
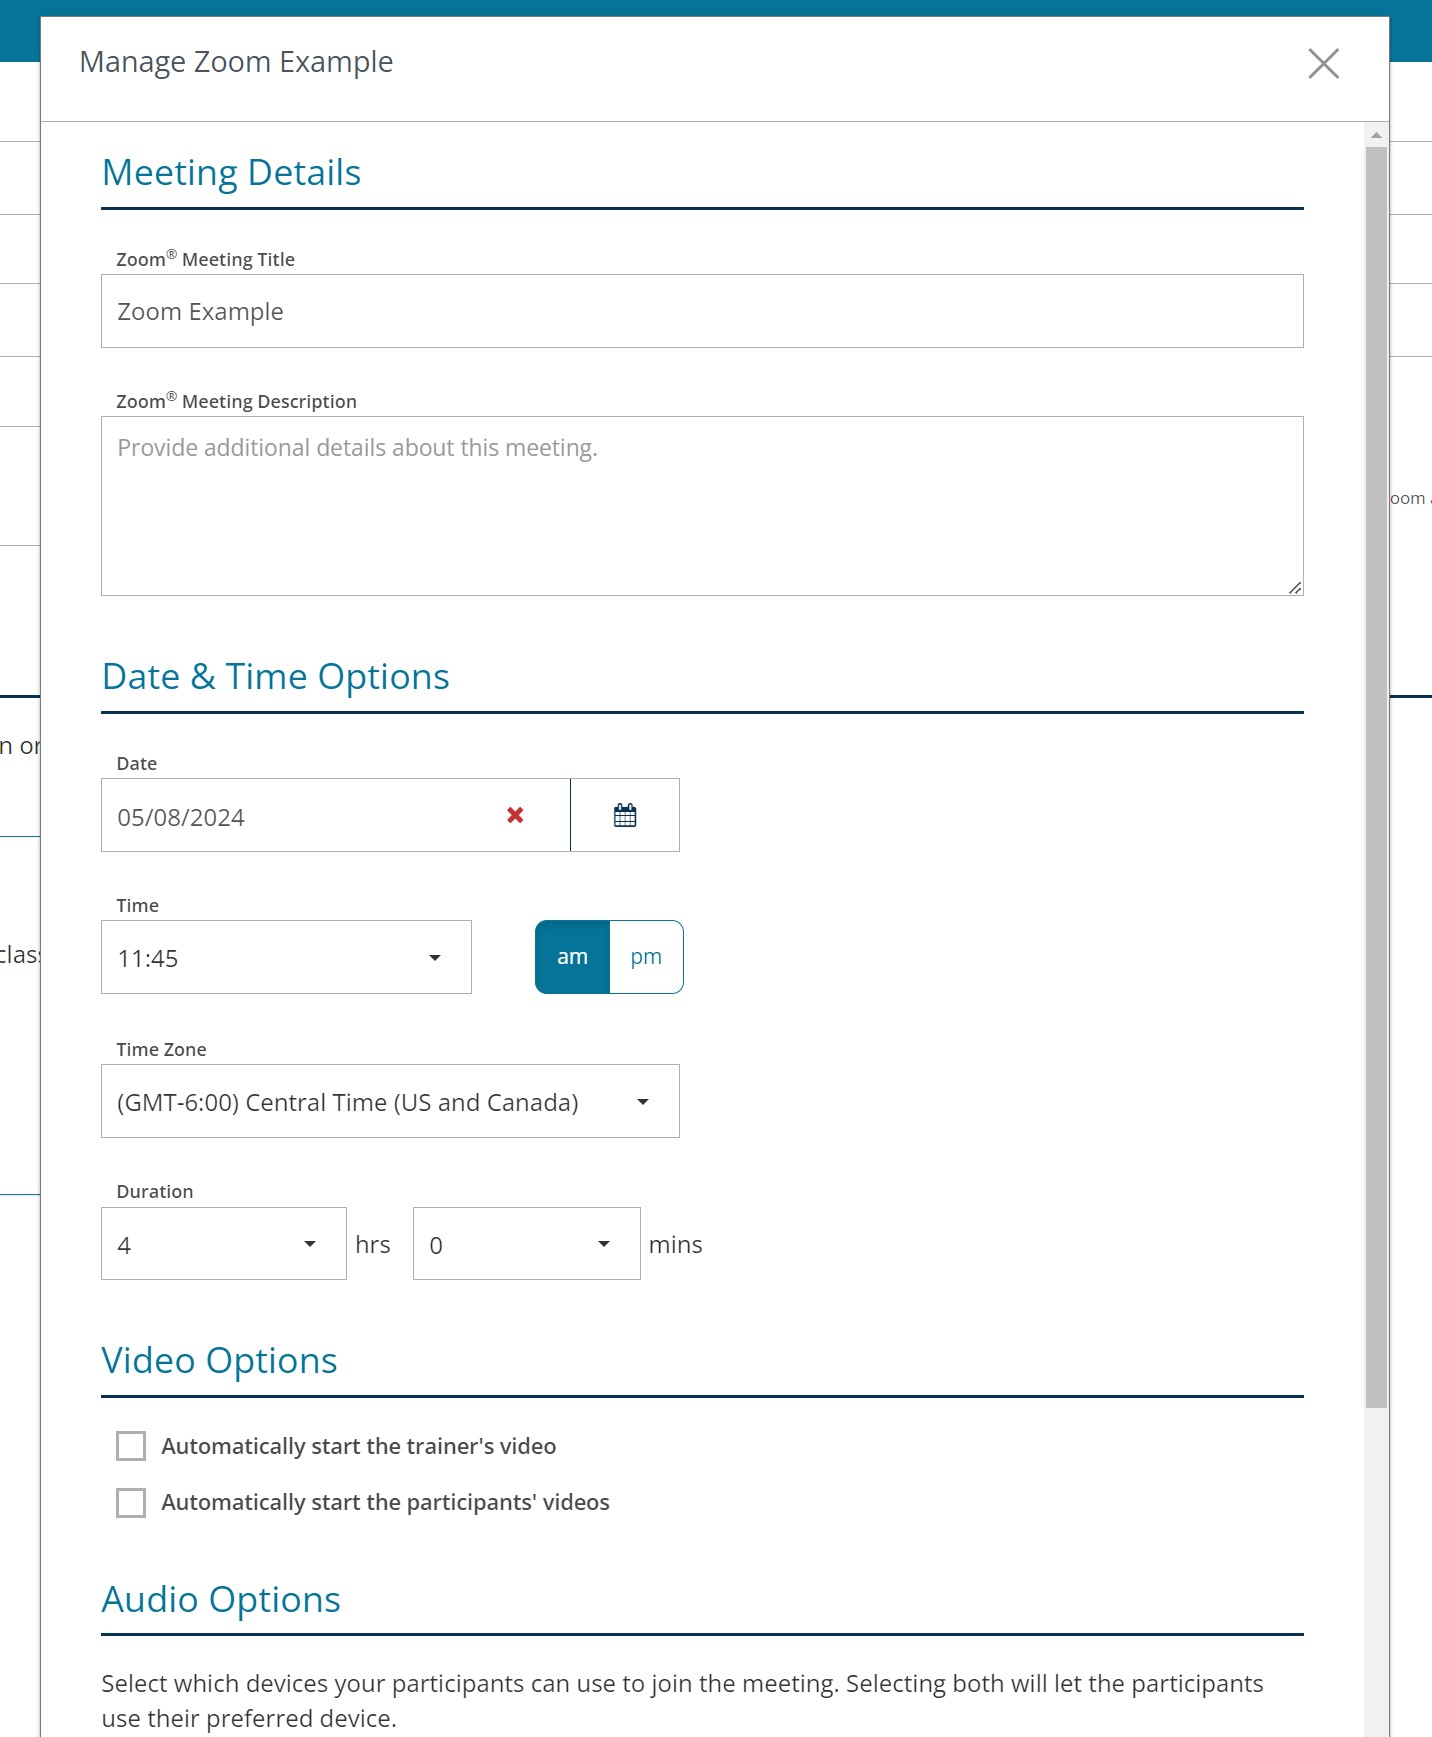
The Zoom meeting is now configured, and the Classroom is ready to be created.
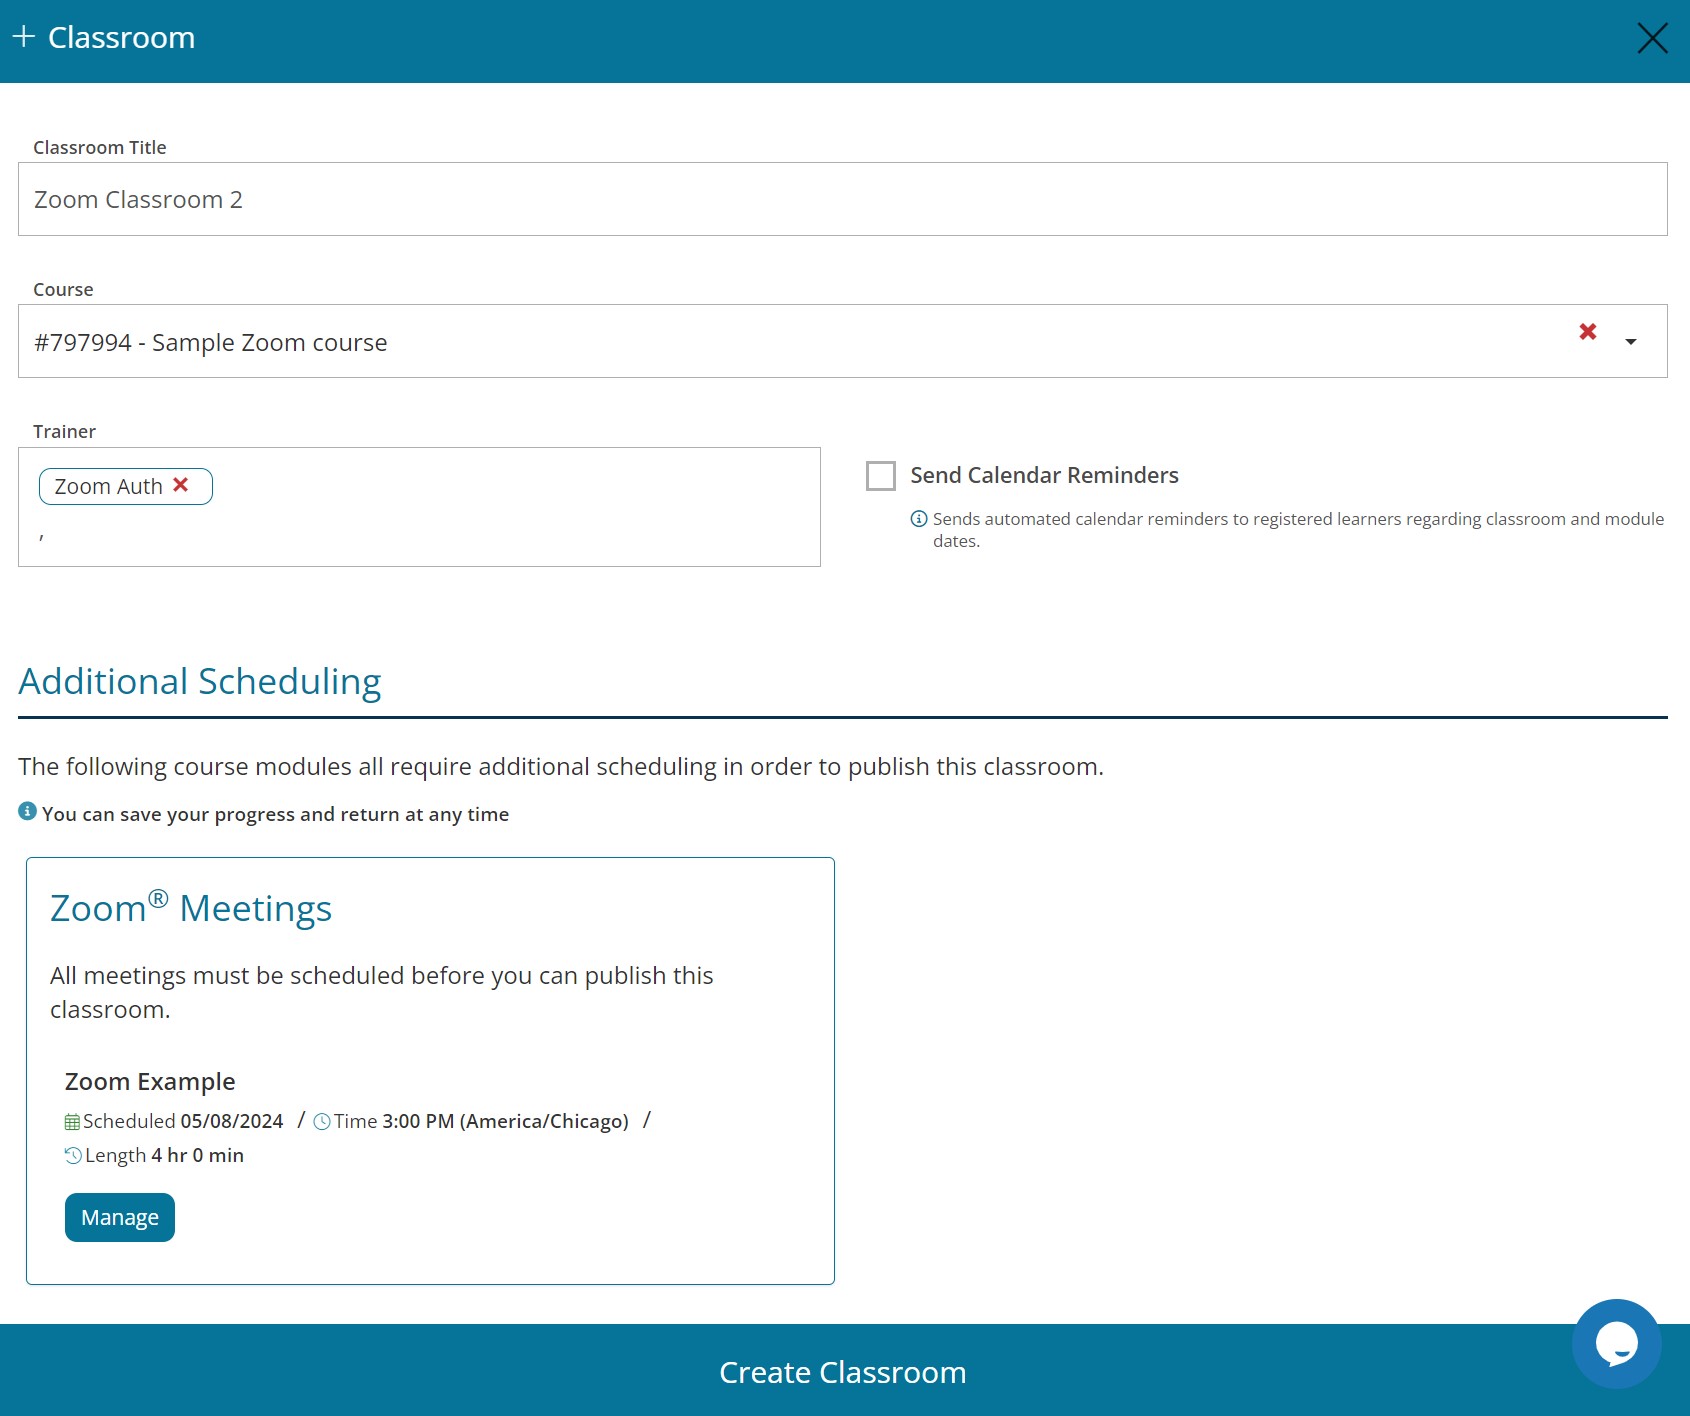
Click Create Classroom to complete the Classroom creation.
The Classroom is now created, and the associated Zoom meeting has been scheduled. This information can continue to be edited until the first learner is invited/registered for the Classroom. At that time, the Classroom data becomes read-only.
Trainers are users responsible for overseeing the Classroom and providing any necessary grading. In terms of Zoom meetings, the trainer will be notified of any Classrooms they are associated to along with additional notifications specific to any applicable Zoom meeting times for those Classrooms.
Trainers can access their Zoom meetings directly from their Insight Trainer Dashboard
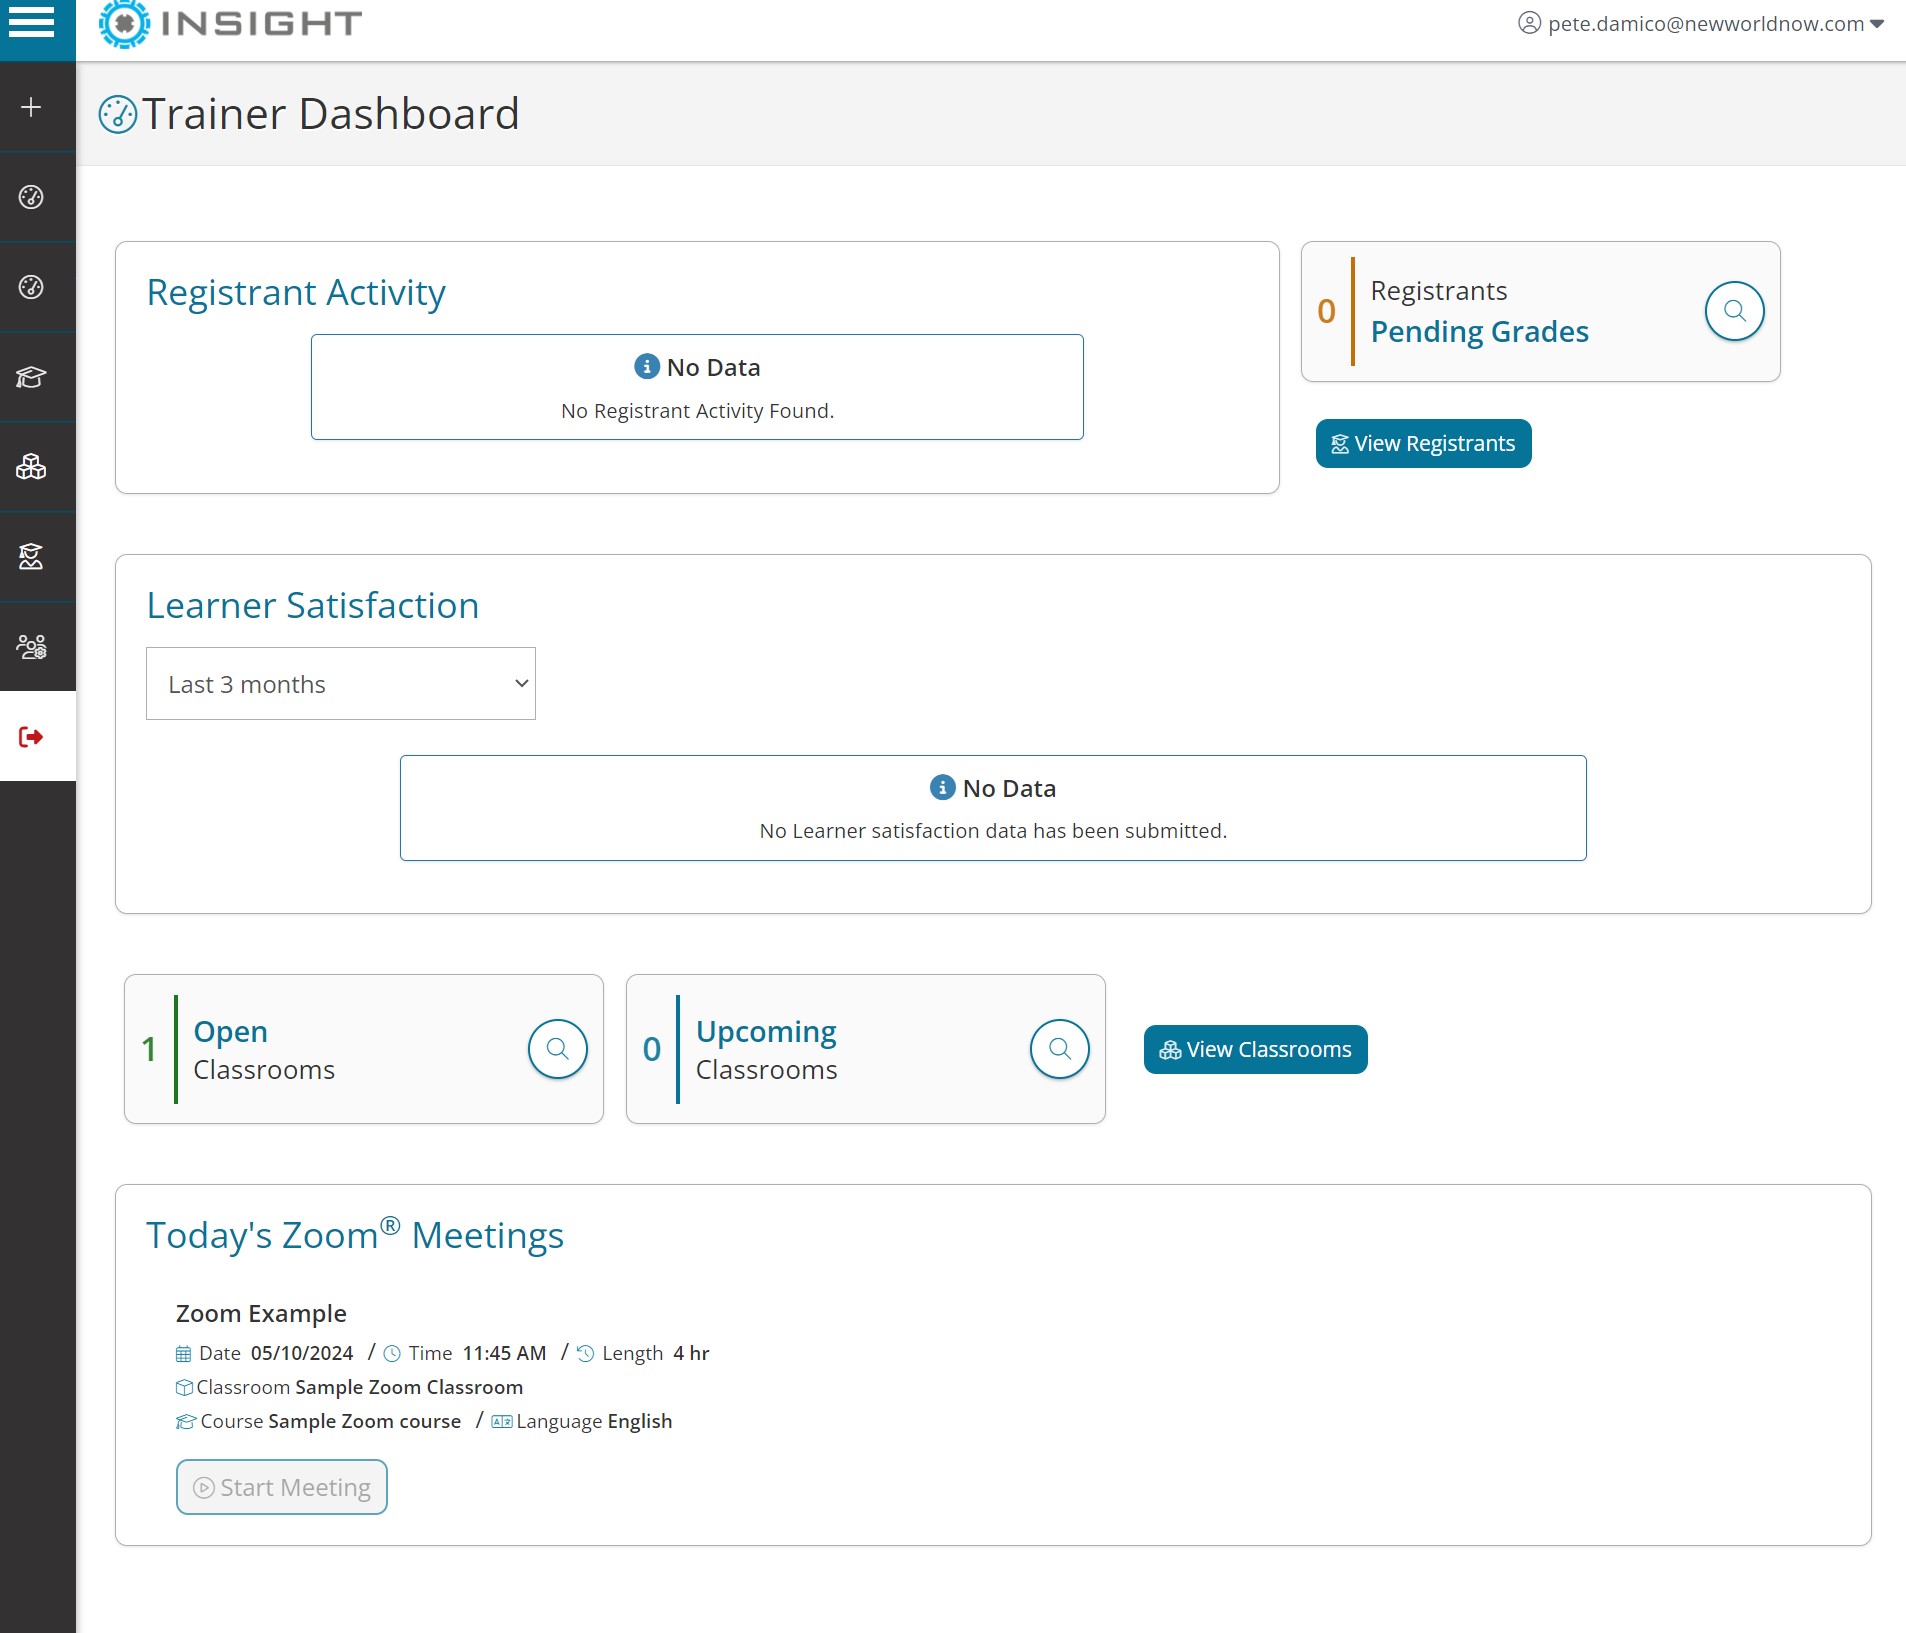
A list of the days Zoom meetings are provided to them, but they are only accessible during the meetings set time frame.
Clicking the Start Meeting button will direct the trainer to their Zoom account, where Zoom will function as it does.
Learners are users who interact with the Classroom. They too can access scheduled Zoom meetings as part of their classroom experience.
Learners can either be invited directly to the classroom, or register through a third party system. Regardless of the entry point, they only ever interact with the Insight Classroom.
Once they have access to the Classroom, they will begin working through the course as it's configured. They too can only access the Zoom Meeting during the configured date and time slot.
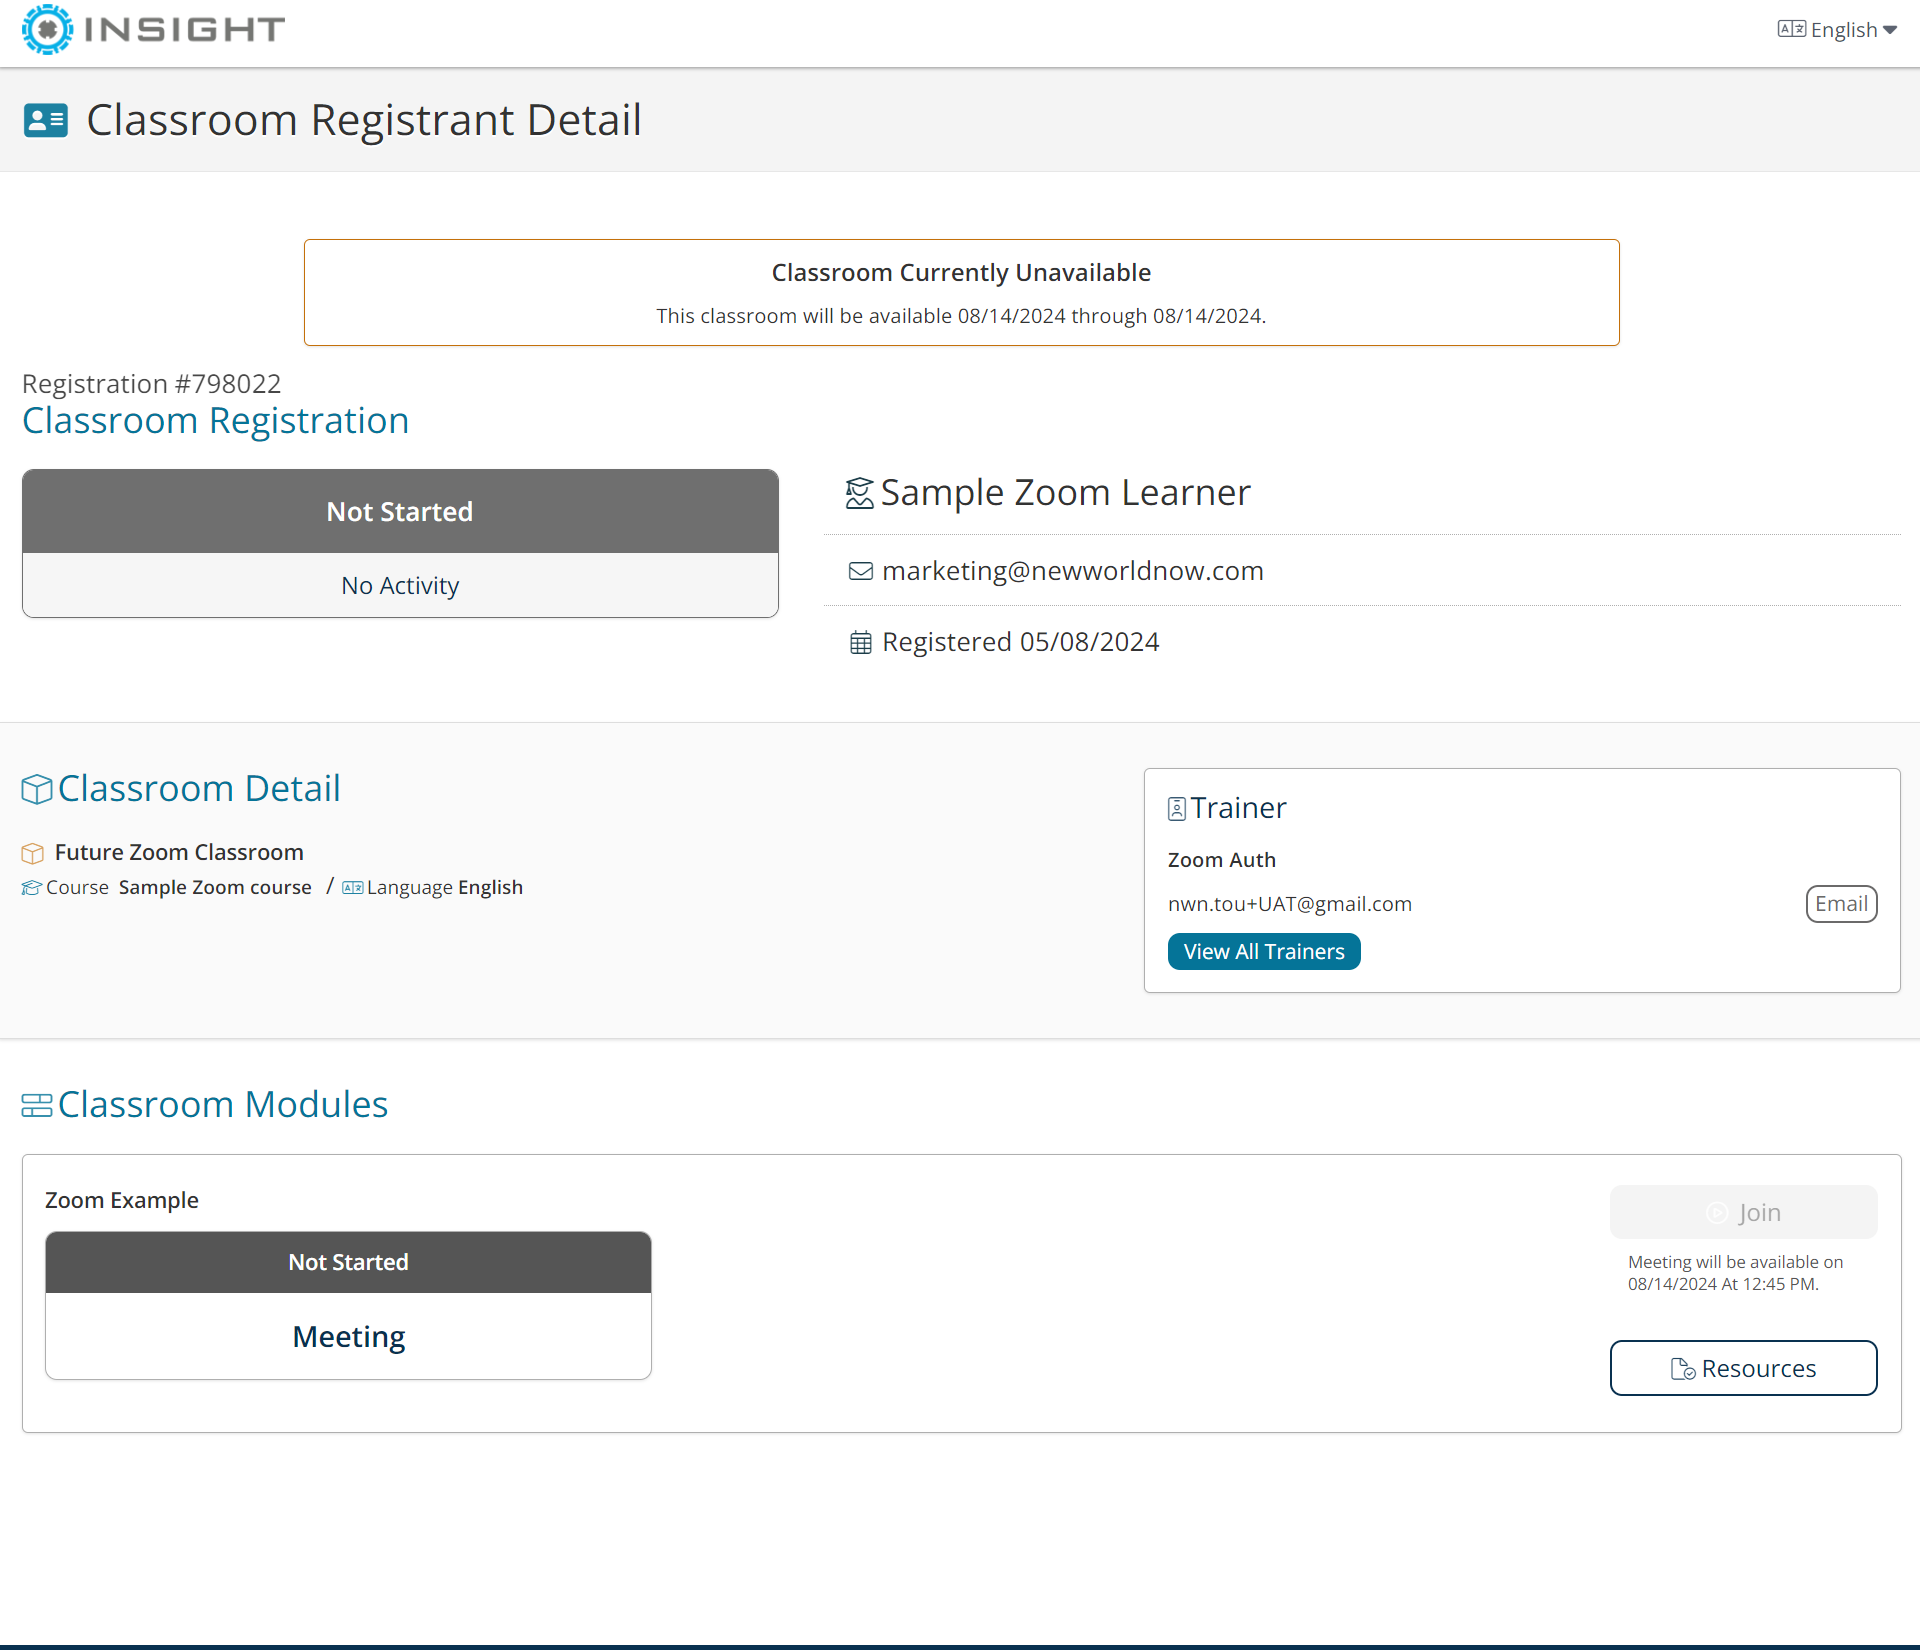
If the Zoom meeting is available, the Learner simply needs to click the Join button. Once they do that, the Learner will be redirected to Zoom to continue with the meeting.
Users who have connected their Insight E-Learning account with their Zoom account can disconnect the accounts at any time.
To disconnect accounts:

Once complete, your Zoom account will no longer be connected to Insight E-Learning, until you go through the connection steps again.